Showing posts with label android. Show all posts
Showing posts with label android. Show all posts
Tuesday, March 10, 2015
Introducing the Google Drive Android API
 By Magnus Hyttsten, Developer Advocate, Google Drive
With todays developer preview of the Google Drive Android API in Google Play Services 4.1, you can add the convenience of Google Drive cloud storage to your apps without breaking a sweat.
While Drive integration on Android was possible in the past, the new API creates a faster, seamless experience that enables your apps to integrate with the Drive backend within minutes.
The new API offers a number of benefits:
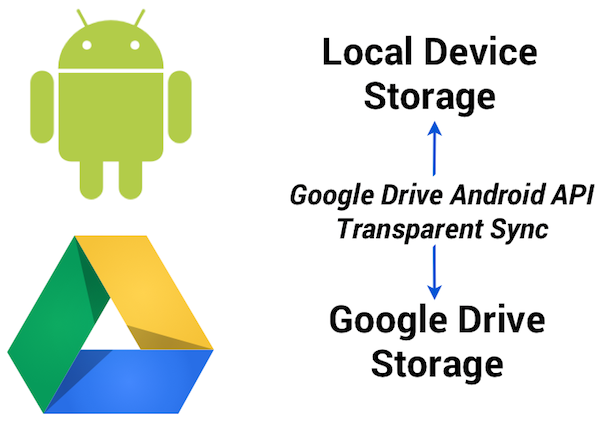
1. Transparent use and syncing of local storage
The Google Drive Android API temporarily uses a local data store in case the device is not connected to a network. So, no need to worry about failed API calls in your app because the user is offline or experiencing a network connectivity problem. Data stored locally in this fashion will automatically and transparently be stored in the Google Drive cloud by Android’s sync scheduler when connectivity is available to minimize impact on battery life, bandwidth, and other resources.
2. Designed for Android and available everywhere
The API was developed for Android and conforms to the latest Android design paradigms, such as using the new uniform client API GoogleAPIClient. And being part of the latest release of Google Play Services provides additional benefits:
- There’s minimal impact on the weight of your apps. As the client library is a stub to Google Play Services, incorporating the API has minimal impact on the size of your .apk binaries, resulting in faster downloads, fewer updates, and smaller execution footprint.
- User files are automatically synced between different devices (provided the app has the same namespace and is signed with the same key).
- Any device running the Gingerbread or later releases of Android and Google Play Services will automatically have support for the Google Drive Android API.
3. User interface components
File picker and creator user interface components are provided with this initial release of the Google Drive Android API, enabling users to select files and folders in Google Drive.
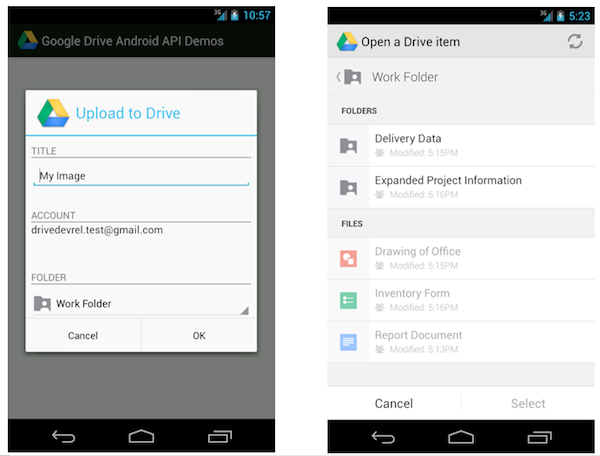
For example, the file picker is implemented as an Intent and allows you develop a native Android user experience with just a couple lines of code. This following code snippet launches the picker and allows the user to select a text file:
// Launch user interface and allow user to select file
    IntentSender i = Drive.DriveApi
        .newOpenFileActivityBuilder()
        .setMimeType(new String[] { “text/plain” })
        .build(mGoogleApiClient);
    startIntentSenderForResult(i, REQ_CODE_OPEN, null, 0, 0, 0);
The result is provided in the onActivityResult callback as usual.
4. Direct access to Drive functionality
You may be wondering how the Google Drive Android API relates to the Storage Access Framework released as part of Android 4.4 KitKat.
The Storage Access Framework is a generic client API that works with multiple storage providers, including cloud-based and local file systems. While apps can use files stored on Google Drive using this generic framework, the Google Drive API offers specialized functionality for interacting with files stored on Google Drive — including access to metadata and sharing features.
Additionally, as part of Google Play services the Google Drive APIs are supported on devices running Android 2.3 Gingerbread and above.
How to get started
As you incorporate the Google Drive Android API into your apps, we hope it makes your life a little bit easier, and enables you to create fun, powerful apps that take advantage of all that Android and Google Drive can do together.
For more information visit our documentation or explore our API demo and other sample applications on the official Google Drive GitHub repository.
Also check out the official launch video:
Let’s keep the discussions going on +GoogleDrive, and Stack Overflow (google-drive-sdk).
Magnus Hyttsten is a Developer Advocate on the Google Drive team. Beyond work, he enjoys trying out new technologies, thinking about product strategies, and exploring California.
Posted by Scott Knaster, Editor
Cross posted on the Google Developers Blog.

Wednesday, February 18, 2015
Microsoft Investing in Cyanogen Which Wants to Take Android from Google

Microsoft is getting ready for a newer and unexpected battle with Google. This time, Microsoft plans to take on Android by investing in Cyanogen.
Cyanogen is a startup which makes and maintains its own version of Android. Cyanogen is currently being used in the OnePlus One, the flagship killer, a smartphone which has garnered rave reviews last year.
The Wall Street Journal reports that Microsoft is investing $70 million in Cyanogen which is best known for its customized version of Android. Cyanogen has reportedly raised $100 million to date. This should be noted that Cyanogen recently refused an offer from Google and hopes to live its dream of being an open version of Android alive.
WSJ writes:
“Microsoft would be a minority investor in a roughly $70 million round of equity financing that values Cyanogen in the high hundreds of millions.”
What could be Microsoft’s intentions?

This is important and unusual because Microsoft is owner of its very own Windows Phone operating system and is gearing up for the upcoming launch of Windows 10 for mobile devices. This move of Microsoft can be attributed to its commitment to embrace open source and maybe some mischief.
Cyanogen claims to have a team of 9,000 volunteer software developers. Cyanogen’s Chief Executive Kirt McMaster told WSJ last week:
“We’re going to take Android away from Google.”

Buy OnePlus One – The Flagship Killer here: OnePlus One (64GB, Sandstone Black)- Invite Only

Apart from different versions of Android for the smartphone makers, Google also releases the Android core under an open-source license. This version is free for everybody and anyone can use and modify or fork this core without linking the Google services. The best examples are Amazon’s products which run on forked Android. These independent versions are already very popular in China where Google has struggled to leave its mark.
These types of Android versions, which are not under Google’s control, are a problem for Google because not every forked version promotes and uses Google’s services and hence, Google makes no money. Due to this Microsoft’s investment in Cyanogen, it will be harder for Google to bring all version of Android under its control.
Microsoft and Cyanogen, both have declined to comment. By investing in Cyanogen, Microsoft can get more users and claim a bigger share of the mobile market. Under the new CEO Satya Nadella, Microsoft has shown such commitments to open source in the past.
Tuesday, February 17, 2015
Got Lollipop 10 cool things to try with Android 5 0
 |
| Googles Android 5.0 release is more than just a pretty makeover. Here are 10 fun features youll definitely want to explore once you have Lollipop in front of you |
Theres plenty of new stuff to see, of course -- but once youve finished exploring all the fresh and fancy visuals, here are 10 cool things to try with Lollipop on your Android phone or tablet:
1. Set up a trusted Bluetooth device.
If you have a Moto phone, you may have done this before -- but for the rest of the world, its uncharted terrain: the ability to have your Android device stay unlocked anytime a specific Bluetooth device is present and paired.To set it up, head into your phone or tablets system settings and tap "Security." Make sure you have "Screen lock" set to something other than "Swipe"; youll need to have a pattern, password, or PIN established so your phone can automatically secure itself whenever your trusted Bluetooth device isnt around.
Once youve done that, tap "Smart Lock" on that same menu and then tap "Trusted devices." Tap the red plus sign and follow the prompts to pair your smartwatch, car stereo, portable speaker, or practically anything else -- then sit back and enjoy having easy access to your Android gadget whenever the Bluetooth device is nearby.
(You probably dont have access to it yet, by the way, but youll soon be able to set a trusted place as well. An incoming update to Google Play Services should add that option to all Lollipop devices within the coming days.)
2. Check out the revamped Face Lock feature.
While youre in that same "Security" menu, go back into "Smart Lock" and tap "Trusted face." Follow the prompts to train the system to recognize your face, then press the power button and give it a whirl.
3. Take Lollipops always-listening voice command system out for a spin.
Provided your phone or tablet supports it, you can now give voice commands anytime -- even when your devices display is off.The option to activate the feature is a bit buried: Head into your system settings, tap "Language & input" and then "Voice input," then tap the gear icon next to "Enhanced Google services" and look for a line labeled "Ok Google Detection."
Tap it, then tap the line labeled "Always on" and follow the prompts to train the system to recognize your voice. While youre in that menu, think about whether you want voice commands to work even when your phone is locked with a pattern, PIN, or password; if you do, tap the line labeled "When locked" before you exit out.
Once youre all done, just say "Okay, Google" and your phone will start listening. You can then ask it a question or give it all sorts of commands and have it work for you whether its in your hands or not.
4. Interact with a notification on the lock screen.
Lollipop brings a whole new look to the Android lock screen, and your personal notifications are the main attraction. Next time you press your devices power button and see a notification waiting, try swiping it horizontally in either direction to dismiss it. You can also tap on it twice to open it or swipe downwards on it to expand it and gain access to any quick commands available (like archiving or replying to an email).5. Set up and try priority notification mode.
One of Lollipops more complex but also potentially useful features is the systems new priority notification mode -- essentially a customizable "do not disturb"-style setting for your tablet or phone. Whenever the priority mode is active, only notifications that are considered "high priority" will make a sound and alert you; any other notifications will show up but remain silent.To get started, press your devices volume up or volume down key while the display is on and then tap "Priority" in the panel that appears at the top of the screen. Select either to leave that mode on indefinitely (the default) or to specify a finite amount of time -- an hour, two hours, whatever -- for which itll remain active.

While you have that panel open, take a minute to visit the priority notification settings to make sure its set up the way you want: After pressing a volume key and tapping "Priority," tap the gear icon next to the words "Priority interruptions only." Now think about what types of notifications you want to alert you when you have the priority mode active. You can opt to allow any combination of events and reminders, calls, and messages -- and with the latter two, you can either allow any calls and messages to come through or allow only calls and messages from approved contacts.
6. Schedule a recurring priority notification mode.
Lollipops priority notification mode can automatically activate itself at certain recurring times -- if, say, you want your phone to remain silent except for emergency calls and messages during the night.Go back into that same menu we were just in (you can also get to it by going into the main system settings and tapping "Sound & notification," then "Interruptions"). Scroll down to the bottom of the screen and select what days and times you want the priority mode to activate.
Once youve done that, your device will automatically go into priority notification mode during those windows -- and youll be bothered only by the notifications you absolutely need.
7. Customize how app notifications behave.
Want to take things a step further? Lollipop lets you customize notifications on an app-by-app basis so that any apps alerts can be considered "high priority" all the time.If you set an app to be high priority, youre effectively whitelisting it: Any notifications generated by that app will always alert you, even if your device is in priority-only mode. The apps notifications will also always appear at the top of your notification panel, above any others.

All you have to do is head into your system settings, select "Sound & notifications" and then select "App notifications." Tap any app you want to customize, then toggle the switch for "Priority" to whitelist it.
8. Prepare your phone for guest access.
If you ever pass your phone or tablet off to a friend, Lollipops new guest mode is well worth exploring.To see how it works, open up your devices Quick Settings panel by swiping down from the top of the screen and then swiping down a second time. Tap the circular avatar at the far right corner, then tap "Guest."
When youre ready to switch back to your own account, do that same thing but tap your name instead of "Guest." If you have a security pattern, PIN, or password set, youll be prompted to enter it before proceeding.
9. Pin something to your devices screen.
Weve all been there: Someone you know needs to borrow your phone "for a quick sec" to make a call or look something up online. Or maybe you want to hand your device over to the little one so she can play a game while the grown-ups talk. A new Lollipop feature called Screen Pinning is designed to let you do those types of things without any hassle -- and without having to worry about the person getting into something they shouldnt.Take a moment now to enable it: Go into the main system settings, select "Security," scroll down to "Screen Pinning," and set it to "On."
Then take it for a test run: Tap the Recent Apps key (the square to the right of the Home key) and scroll upward. Youll see a pushpin icon on the most recent app or process youve had open. Tap it and then confirm that you want to pin that process.

To exit the pinned mode, press the Back and Recent Apps (apparently also now known as "Overview") buttons at the same time. If you have a PIN, pattern, or password set -- which you should if you want this feature to have much meaning -- youll need to enter it in order to return the device to its normal state.
10. Beam something to another device.
Android Beam has been around for a while, but its always been hard to know exactly when and how it can work. With Lollipop, Beam is integrated into the system sharing function and is consequently easier to use and more versatile than ever.See for yourself: Open up the Photos app on your device and tap any image you like. Then tap the share icon at the bottom of the screen and select "Android Beam" from the list of choices that appears.
Your phone or tablet will instruct you to bring another Android device against its back. Just make sure the other device is unlocked, then bring them back to back -- and shazam: The photo you selected will transfer wirelessly from one device to the other, even if the other device isnt on Lollipop. No wires, no special apps, no third-party services required.
(Both devices will need to support NFC in order for this to work, but pretty much every reasonable Android device released in the past few years does.)
You can do the same thing anywhere the share command is available -- a social media app, a file manager, you name it. Images, links, contacts, and any other type of shareable content should work.
Bonus: Try your hand at Lollipops hidden Flappy Bird game.
Google loves including fun little Easter eggs in its products, and Lollipop is no exception. Go into your system settings, select "About phone" (or tablet) and then tap the line labeled "Android version" a bunch of times in a row.When you see a large Lollipop graphic appear on your screen, tap the circle part of the image about five times and then press and hold your finger to it. Youll then be taken into an Android-themed Flappy Bird-like game, with lots o lollipop obstacles to jump through and avoid.
Flap, flap, flap. One final tip: If you find yourself playing for more than 10 minutes, put down your device and smack yourself in the head with the nearest rubber mallet. Youll thank me later.
The Top 4 Websites to Create Android Apps Online for Free

In this article I am sharing the 4 best websites that allows the facility to create genuine android apps without any programming knowledge. You can create your own app online using your browser for absolutely free. There is no need of any android development tool.
Also Read: Top 5 Cheapest Android Tablets below Rs. 5000 in India in 2013
Also Read: 4 Best Tips to Clean Your Touch Screen Device
AppsGeyser
AppsGeyser comes at first in this list. It is free web platform that allows you to create android app in easy steps. There is no need to code or even know how it works.
Andromo
With Andromo, anyone can make a professional android app. There is no programming required. Andromo generates 100% genuine android apps. They are faster, more efficient, better looking and more reliable than apps made with any other app development tool.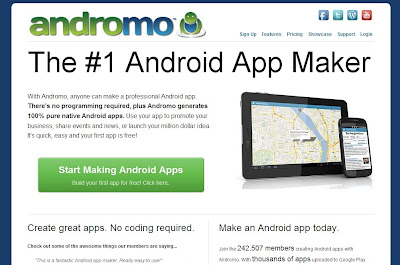
App.Yet
Using App.Yet, you can easily create a professional Android app. It is simple, easy and reliable. It will only take few minutes to build your own app.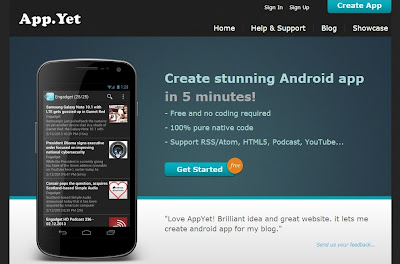
Also Read: C4droid: Download Free C/C++ Compiler for Android Platform
Also Read: Top 8 Free Alternatives to Paid Softwares
App Maker
It allows you to create your own android apps for free with easy-to-use builder. You can create your own applications online with your web browser. No special android development SDK software is required.
I have created this list on my own knowledge and by doing research on the internet. There are lots of other websites better then these. So try them, build your app and share your experience.
Source: http://www.shoutmeloud.com/5-sites-to-create-your-own-android-apps-for-free.html
Thursday, February 5, 2015
Wintouch Q93S 9 Inch Allwinner A13 Android Tablet Pc Firmware
Wintouch Q93S 9 Inch
Allwinner A13
Android Tablet Pc Firmware.
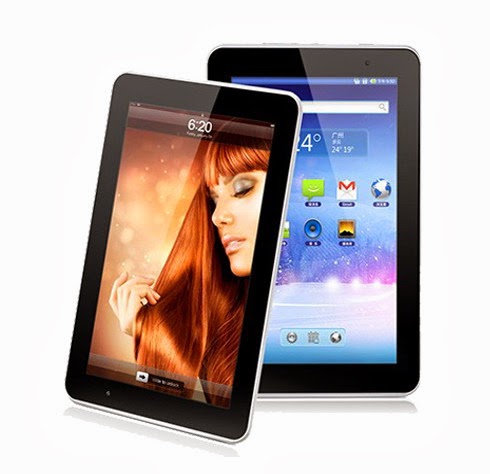 |
| wintouch Q93s Tablet Pc |
Basic steps for flashing tablet firmware for newbies.
What board id ,BoxChip,CPU Chip ,does my tablet pc have ?
Frequently Asked Question
Encyclopedia:-
Read Article About Allwinner Technology
Tablet PC Specifications:
LCD
|
9 inch Capacitive 5-point multi-touch
|
Screen Resolution
|
800 x 480 Pix
|
Processor
|
1.2 Ghz Single Core Cortex A8 , Mali 400
|
Chipset / Boxchip
|
Allwinner A13
|
RAM
|
512 MB
|
Built in Memory
|
8 GB
|
External Memory
|
Support Micro Card (Upto 32GB)
|
Wifi
|
802.11 b/g/n supported
|
Blue tooth
|
Yes
|
Sim/GSM/CDMA
|
N/A
|
Camera
|
0.3 Megapixel front , 2 mp rear cam
|
HDMI /3g Dongle
|
HDMI (1080 P) ,Support 3G Dongle
|
Microphone/SPK
|
Built IN /0.5 w speaker
|
Battery
|
3800 mAh
|
Android Version
|
4.0.4
|
Tablet Pc Support:
Tablet Flashing Tools:
- Tablet Flashing Tool : Firmware upgrade tool LiveSuit & Drivers
- Tablet Flashing Tool: Firmware upgrade Tool Phoenix Usb Pro
Flashing Tutorials for Allwinner Tablets:
- LiveSuit Tutorial : how to flash tablet with LiveSuit
- Phoenix Usb Pro Tutorial :Read Instructions
- Phoenix Usb PrO Video Tutorial :Tutorial
- Phoenixcard Tool:Firmware update instruction with microSD card
- See also Phoenixcard Tools
Recommended Tools :
You can also use : Android Multi Tools
When I need to restore my tablet pc ?
In Case of Following
1. Forgotten Pattern Lock on Android Tablets.
2.Too many pattern attempts / Reset user lock.
3. Tablets PC stuck on Gmail account.
4. Android Tablet PC stuck on Android logo.
5. Tablet Android hang on start-up / Multiple errors generating by OS.
6. Android Market having problems or generating errors.
7.Upgrading to new Android version.
6. Android Market having problems or generating errors.
7.Upgrading to new Android version.
you can use this Android Tablet firmware, ROM to restore your Android China tablets to generic firmwares or upgrades . Make sure to charge battery upto 60%. Power failure during flashing may result dead or broken tablets.
Note : Flashing generic tablet firmware should be last option.
Download Stock Rom
Tuesday, February 3, 2015
Zen Ultra A100 GSensor 20130426 android tablet firmware
Zen Ultra A100 G Sensor
Android Tablet Firmware
how to flash tabletSpecification:
Model : Ultra Tab A100
Screen Size : 7 Inch
CPU : 1.2GHz
Display : 800 x 480px
RAM : 512 MB
Memory : 4 GB
External Memory : Micro SD (Support upto 16gb)
External Memory : Micro SD (Support upto 16gb)
Operation System : Android 4.0.3
Camera : 1.3 megapixels
HDMI : Available
Bluetooth : Available
Chipset : Allwinner
GSM/CDMA : Wifi Only
Weight : 295 g
GSM/CDMA : Wifi Only
Weight : 295 g
Flashing Tool : LiveSuit Pack & Phoenix Pack Tool
Flashing Tutorial : how to flash tablet with Livesuit
You can also use : Android Multi Tools
The following firmware / ROM file used to be when your tablet facing various problems . In case of Forgotten Pattern Lock , Tablet stuck on Gmail account , Tablet stuck on Android logo or Tablet hang on start up you can use this Tablet firmware , ROM to make your Android China tablet working again .
Flashing Tablet should be last option.
The following firmware / ROM file used to be when your tablet facing various problems . In case of Forgotten Pattern Lock , Tablet stuck on Gmail account , Tablet stuck on Android logo or Tablet hang on start up you can use this Tablet firmware , ROM to make your Android China tablet working again .
Flashing Tablet should be last option.
ANDROID TABLET FIRMWARE
Sunday, February 1, 2015
Android beginner tutorial Part 60 Introduction to Services
In this tutorial we will find out what Services are and what they are used for.
A Service in Android is a component similar to Activity. The difference between the two is that a Service runs in the background, it has no user interface whatsoever. Because of that, they are used to perform actions that dont need user interaction. A Service keeps running until it is stopped by something else or if it stops itself.
Using Intents, applications can connect and interact with Services. There can be more than one application connected to a single Service.
Just like the Activity class, Service has lifecycle methods. The 3 main ones are onCreate(), onStartCommant() and onDestroy().
A Service can be started by an application using Context.startService() method. It can be stopped using Context.stopService().
A Service can stop itself using Service.stopSelf() or Service.stopSelfResult() methods.
It is possible to connect to a running Service and use that connection to interact with the Service. The connection is established using Context.bindService() method and stopped using Context.unbindService().
If a Service has been stopped, it can be resumed using the bindService() method.
The onStartCommand() function is called by the system every time the service is explicitly called using the startService() method. It provides the arguments that are passed to the method, as well as a unique token of the start request. The onCreate() and onDestroy() methods are called in all Services regardless of whether they were added using startService() or bindService() methods.
Any Service can potentially interact with the user, because any Service can receive client requests. If a Service allows other applications to connect to it, its binding is done using these methods: onBind(), onUnbind() and onRebind(). They all receive Intent objects as parameters.
The Intent thats sent to the onBind() function is the one that was used in the bindService() function. The Intent thats sent to the onUnbind() function is the one that was used in unbindService().
The onBind() method returns the connection channel, which the clients can use to interact with the Service. The onRebind() function can be called after onUnbind(), if a new client connects to the Service.
Thats all for today. We will begin creating Services in the next part.
Thanks for reading!
Read more »
A Service in Android is a component similar to Activity. The difference between the two is that a Service runs in the background, it has no user interface whatsoever. Because of that, they are used to perform actions that dont need user interaction. A Service keeps running until it is stopped by something else or if it stops itself.
Using Intents, applications can connect and interact with Services. There can be more than one application connected to a single Service.
Just like the Activity class, Service has lifecycle methods. The 3 main ones are onCreate(), onStartCommant() and onDestroy().
A Service can be started by an application using Context.startService() method. It can be stopped using Context.stopService().
A Service can stop itself using Service.stopSelf() or Service.stopSelfResult() methods.
It is possible to connect to a running Service and use that connection to interact with the Service. The connection is established using Context.bindService() method and stopped using Context.unbindService().
If a Service has been stopped, it can be resumed using the bindService() method.
The onStartCommand() function is called by the system every time the service is explicitly called using the startService() method. It provides the arguments that are passed to the method, as well as a unique token of the start request. The onCreate() and onDestroy() methods are called in all Services regardless of whether they were added using startService() or bindService() methods.
Any Service can potentially interact with the user, because any Service can receive client requests. If a Service allows other applications to connect to it, its binding is done using these methods: onBind(), onUnbind() and onRebind(). They all receive Intent objects as parameters.
The Intent thats sent to the onBind() function is the one that was used in the bindService() function. The Intent thats sent to the onUnbind() function is the one that was used in unbindService().
The onBind() method returns the connection channel, which the clients can use to interact with the Service. The onRebind() function can be called after onUnbind(), if a new client connects to the Service.
Thats all for today. We will begin creating Services in the next part.
Thanks for reading!
Saturday, January 31, 2015
Android beginner tutorial Part 37 Graphics in GridView
In this tutorial we will learn how to display graphical data in GridViews.
First of all, well need to prepare some sample images. I put 4 images called sample1.jpg, sample2.jpg, sample3.jpg and sample4.jpg in the drawable-hdpi folder of my android project.
Once thats done, we can use them in our application.
Start by creating an Activity with a GridView:
To display images in a GridView, well need to create a custom adapter class. We will extend the BaseAdapter class and call our new custom class ImageAdapter.
If youre using Eclipse IDE, go to File > New > Class. Create the new java class, and use this code:
The logic behind the code is simple, the important part is to include everything the class needs to function properly. Note that we declare the array of pictures in the class itself, and then use an ImageView to display each item. If the ImageView object already exists, we reuse it.
The code of MainActivity.java class is simple too - just apply the adapter to the grid. The only unusual thing here is the passing of getApplicationContext() value to the ImageAdapter constructor.
The results look like this:
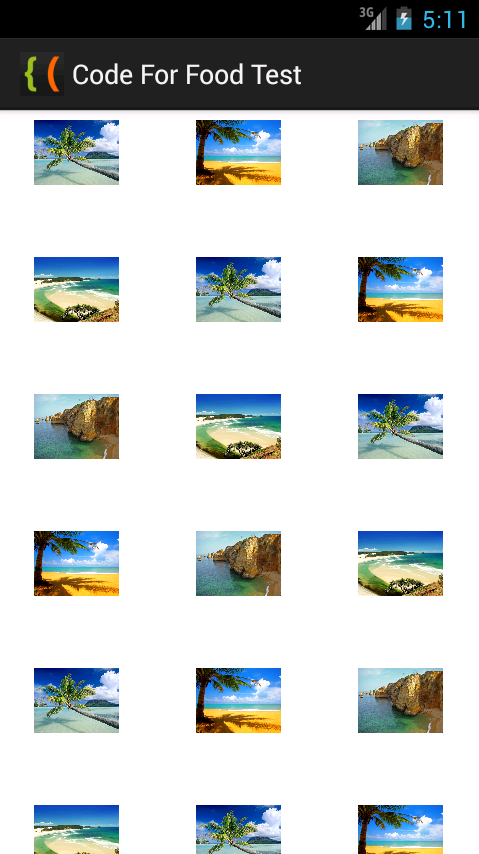
Thanks for reading!
Read more »
First of all, well need to prepare some sample images. I put 4 images called sample1.jpg, sample2.jpg, sample3.jpg and sample4.jpg in the drawable-hdpi folder of my android project.
Once thats done, we can use them in our application.
Start by creating an Activity with a GridView:
<LinearLayout xmlns:android="http://schemas.android.com/apk/res/android"
    xmlns:tools="http://schemas.android.com/tools"
    android:layout_width="match_parent"
    android:layout_height="match_parent"
    android:orientation="vertical"
    tools:context=".MainActivity" >

<GridView
    android:id="@+id/grid"
    android:layout_width="fill_parent"
    android:layout_height="fill_parent"
    android:verticalSpacing="35dp"
    android:horizontalSpacing="5dp"
    android:numColumns="auto_fit"
    android:columnWidth="100dp"
    android:stretchMode="columnWidth"
    android:gravity="center"
    />

</LinearLayout>
To display images in a GridView, well need to create a custom adapter class. We will extend the BaseAdapter class and call our new custom class ImageAdapter.
If youre using Eclipse IDE, go to File > New > Class. Create the new java class, and use this code:
package com.kircode.codeforfood_test;

import android.content.Context;
import android.view.View;
import android.view.ViewGroup;
import android.widget.BaseAdapter;
import android.widget.GridView;
import android.widget.ImageView;

public class ImageAdapter extends BaseAdapter {


    private Integer[] mPictures = {
    R.drawable.sample1, R.drawable.sample2,
    R.drawable.sample3, R.drawable.sample4,
    R.drawable.sample1, R.drawable.sample2,
    R.drawable.sample3, R.drawable.sample4,
    R.drawable.sample1, R.drawable.sample2,
    R.drawable.sample3, R.drawable.sample4,
    R.drawable.sample1, R.drawable.sample2,
    R.drawable.sample3, R.drawable.sample4,
    R.drawable.sample1, R.drawable.sample2,
    R.drawable.sample3, R.drawable.sample4,
    R.drawable.sample1, R.drawable.sample2,
    R.drawable.sample3, R.drawable.sample4
    };
    private Context mContext;

    public ImageAdapter(Context c) {
        mContext = c;
    }

    public int getCount() {
        return mPictures.length;
    }

    public Object getItem(int position) {
        return mPictures[position];
    }

    public long getItemId(int position) {
        return mPictures[position];
    }

    // create a new ImageView for each item referenced by the Adapter
    public View getView(int position, View convertView, ViewGroup parent) {
        ImageView imageView;
        if (convertView == null) {  // if its not recycled, initialize some attributes
            imageView = new ImageView(mContext);
            imageView.setLayoutParams(new GridView.LayoutParams(85, 85));
            imageView.setScaleType(ImageView.ScaleType.CENTER_CROP);
            imageView.setPadding(10, 10, 10, 10);
        } else {
            imageView = (ImageView) convertView;
        }

        imageView.setImageResource(mPictures[position]);
        return imageView;
    }
}
The logic behind the code is simple, the important part is to include everything the class needs to function properly. Note that we declare the array of pictures in the class itself, and then use an ImageView to display each item. If the ImageView object already exists, we reuse it.
The code of MainActivity.java class is simple too - just apply the adapter to the grid. The only unusual thing here is the passing of getApplicationContext() value to the ImageAdapter constructor.
package com.kircode.codeforfood_test;

import android.app.Activity;
import android.os.Bundle;
import android.view.Menu;
import android.widget.GridView;

public class MainActivity extends Activity{

private GridView grid;

@Override
protected void onCreate(Bundle savedInstanceState) {
super.onCreate(savedInstanceState);
setContentView(R.layout.activity_main);

grid = (GridView)findViewById(R.id.grid);

ImageAdapter arrayAdapter = new ImageAdapter(getApplicationContext());
grid.setAdapter(arrayAdapter);
}

@Override
public boolean onCreateOptionsMenu(Menu menu) {
// Inflate the menu; this adds items to the action bar if it is present.
getMenuInflater().inflate(R.menu.activity_main, menu);
return true;
}

}
The results look like this:
Thanks for reading!
Android MySQL PHP JSON tutorial
In this post Im going to describe how we can read data from MySQL database and show them in a Android list view. You can download the complete Android project from here. To fetch data here I used a PHP script which encodes data into json format.
This project has three main parts.
1. MySQL database
2. PHP web service
3.Android web service client
1. MySQL database.
My database has only one table named "emp_info" and it has two columns. "employee name" and "employee no". "employee no" is the primary key.

2.PHP web service
Use following PHP script to fetch data from the database and to encode data in to json format.
http://cpriyankara.coolpage.biz/employee_details.php
3.Android web service client.
This part is bit complected. Android activity is a combination of Async Task json and list view. If you are not familiar with those stuff look following tutorials.
Android Async Task and web service access
http://codeoncloud.blogspot.com/2013/07/android-web-service-access-using-async.html
Android list view
http://codeoncloud.blogspot.com/2013/07/how-to-populate-android-list-view-from.html
Here is the code for main Android activity.
Add Internet permission to AndroidManifest.xml
Code for main activity layout.

Was above information helpful?
Your comments always encourage me to write more...
Read more »
This project has three main parts.
1. MySQL database
2. PHP web service
3.Android web service client
1. MySQL database.
My database has only one table named "emp_info" and it has two columns. "employee name" and "employee no". "employee no" is the primary key.
Use following PHP script to fetch data from the database and to encode data in to json format.
<?phpYou can see the output of php by clicking below url:
$host="XXXXX"; //replace with database hostname
$username="XXXXX"; //replace with database username
$password="XXXXX"; //replace with database password
$db_name="XXXXXX"; //replace with database name
$con=mysql_connect("$host", "$username", "$password")or die("cannot connect");
mysql_select_db("$db_name")or die("cannot select DB");
$sql = "select * from emp_info";
$result = mysql_query($sql);
$json = array();
if(mysql_num_rows($result)){
while($row=mysql_fetch_assoc($result)){
$json[emp_info][]=$row;
}
}
mysql_close($con);
echo json_encode($json);
?>
http://cpriyankara.coolpage.biz/employee_details.php
3.Android web service client.
This part is bit complected. Android activity is a combination of Async Task json and list view. If you are not familiar with those stuff look following tutorials.
Android Async Task and web service access
http://codeoncloud.blogspot.com/2013/07/android-web-service-access-using-async.html
Android list view
http://codeoncloud.blogspot.com/2013/07/how-to-populate-android-list-view-from.html
Here is the code for main Android activity.
package com.axel.mysqlphpjson;

import java.io.BufferedReader;
import java.io.IOException;
import java.io.InputStream;
import java.io.InputStreamReader;
import java.util.ArrayList;
import java.util.HashMap;
import java.util.List;
import java.util.Map;

import org.apache.http.HttpResponse;
import org.apache.http.client.ClientProtocolException;
import org.apache.http.client.HttpClient;
import org.apache.http.client.methods.HttpPost;
import org.apache.http.impl.client.DefaultHttpClient;
import org.json.JSONArray;
import org.json.JSONException;
import org.json.JSONObject;

import android.os.AsyncTask;
import android.os.Bundle;
import android.app.Activity;
import android.view.Menu;
import android.widget.ListView;
import android.widget.SimpleAdapter;
import android.widget.Toast;

public class MainActivity extends Activity {
 private String jsonResult;
 private String url = "http://cpriyankara.coolpage.biz/employee_details.php";
 private ListView listView;

 @Override
 protected void onCreate(Bundle savedInstanceState) {
  super.onCreate(savedInstanceState);
  setContentView(R.layout.activity_main);
  listView = (ListView) findViewById(R.id.listView1);
  accessWebService();
 }

 @Override
 public boolean onCreateOptionsMenu(Menu menu) {
  // Inflate the menu; this adds items to the action bar if it is present.
  getMenuInflater().inflate(R.menu.main, menu);
  return true;
 }

 // Async Task to access the web
 private class JsonReadTask extends AsyncTask<String, Void, String> {
  @Override
  protected String doInBackground(String... params) {
   HttpClient httpclient = new DefaultHttpClient();
   HttpPost httppost = new HttpPost(params[0]);
   try {
    HttpResponse response = httpclient.execute(httppost);
    jsonResult = inputStreamToString(
      response.getEntity().getContent()).toString();
   }

   catch (ClientProtocolException e) {
    e.printStackTrace();
   } catch (IOException e) {
    e.printStackTrace();
   }
   return null;
  }

  private StringBuilder inputStreamToString(InputStream is) {
   String rLine = "";
   StringBuilder answer = new StringBuilder();
   BufferedReader rd = new BufferedReader(new InputStreamReader(is));

   try {
    while ((rLine = rd.readLine()) != null) {
     answer.append(rLine);
    }
   }

   catch (IOException e) {
    // e.printStackTrace();
    Toast.makeText(getApplicationContext(),
      "Error..." + e.toString(), Toast.LENGTH_LONG).show();
   }
   return answer;
  }

  @Override
  protected void onPostExecute(String result) {
   ListDrwaer();
  }
 }// end async task

 public void accessWebService() {
  JsonReadTask task = new JsonReadTask();
  // passes values for the urls string array
  task.execute(new String[] { url });
 }

 // build hash set for list view
 public void ListDrwaer() {
  List<Map<String, String>> employeeList = new ArrayList<Map<String, String>>();

  try {
   JSONObject jsonResponse = new JSONObject(jsonResult);
   JSONArray jsonMainNode = jsonResponse.optJSONArray("emp_info");

   for (int i = 0; i < jsonMainNode.length(); i++) {
    JSONObject jsonChildNode = jsonMainNode.getJSONObject(i);
    String name = jsonChildNode.optString("employee name");
    String number = jsonChildNode.optString("employee no");
    String outPut = name + "-" + number;
    employeeList.add(createEmployee("employees", outPut));
   }
  } catch (JSONException e) {
   Toast.makeText(getApplicationContext(), "Error" + e.toString(),
     Toast.LENGTH_SHORT).show();
  }

  SimpleAdapter simpleAdapter = new SimpleAdapter(this, employeeList,
    android.R.layout.simple_list_item_1,
    new String[] { "employees" }, new int[] { android.R.id.text1 });
  listView.setAdapter(simpleAdapter);
 }

 private HashMap<String, String> createEmployee(String name, String number) {
  HashMap<String, String> employeeNameNo = new HashMap<String, String>();
  employeeNameNo.put(name, number);
  return employeeNameNo;
 }
}
Add Internet permission to AndroidManifest.xml
<?xml version="1.0" encoding="utf-8"?>
<manifest xmlns:android="http://schemas.android.com/apk/res/android"
    package="com.axel.mysqlphpjson"
    android:versionCode="1"
    android:versionName="1.0" >

    <uses-sdk
        android:minSdkVersion="8"
        android:targetSdkVersion="17" />

    <uses-permission android:name="android.permission.INTERNET" />

    <application
        android:allowBackup="true"
        android:icon="@drawable/ic_launcher"
        android:label="@string/app_name"
        android:theme="@style/AppTheme" >
        <activity
            android:name="com.axel.mysqlphpjson.MainActivity"
            android:label="@string/app_name" >
            <intent-filter>
                <action android:name="android.intent.action.MAIN" />

                <category android:name="android.intent.category.LAUNCHER" />
            </intent-filter>
        </activity>
    </application>

</manifest>
Code for main activity layout.
<RelativeLayout xmlns:android="http://schemas.android.com/apk/res/android"Quick demo of the application:
xmlns:tools="http://schemas.android.com/tools"
android:layout_width="match_parent"
android:layout_height="match_parent"
android:paddingBottom="@dimen/activity_vertical_margin"
android:paddingLeft="@dimen/activity_horizontal_margin"
android:paddingRight="@dimen/activity_horizontal_margin"
android:paddingTop="@dimen/activity_vertical_margin"
tools:context=".MainActivity" >
<ListView
android:id="@+id/listView1"
android:layout_width="match_parent"
android:layout_height="wrap_content"
android:layout_alignParentTop="true"
android:layout_centerHorizontal="true"
android:layout_marginTop="14dp" >
</ListView>
</RelativeLayout>
Was above information helpful?
Your comments always encourage me to write more...
Thursday, January 29, 2015
Android beginner tutorial Part 56 Activity stacks and tasks
Today we will learn about Activity stacks and tasks.
In Android all Activity objects are saved in a stack. Whenever an Activity launches another Activity, the new one is moved to the stack and becomes the active Activity. The previous one also remains in the stack, but it is moved lower. Activity objects in a stack are never repositioned, they can only be added or removed.
When the user presses the Back button on their device, the current Activity is pushed out of the stack and is replaced with the previous one, which becomes visible again.
If there are multiple Activities of the same class in a stack, they are treated as separate instances.
A stack with Activities in it is called a task, which can be put in the foreground, when one of its Activities is currently active, or in the background, where its completely out of user focus.
If the user doesnt interact with a task for a long period of time, the system clears all of that tasks Activities, except for the main one. To save the state of an Activity before it is destroyed, which is done after the onDestroy() method is called, you can use the onSaveInstanceState() method. Android calls it before creating an Activity, before calling onPause().
The system sends a Bundle object this way, which can be used to store some data to later be able to recreate the same Activity state. When the Activity is once again called, the system kindly sends the Bundle with all the parameters youve written as a parameter of the onCreate() method, as well as the onRestoreInstanceState() method, which is called after onStart(), so that one of them (or both) could return the Activity to what it looked like before.
The onSaveInstanceState() and onRestoreInstanceState() methods are not a part of the lifecycle of an Activity. They wont always be called by the system. For example, the onSaveInstanceState() method is called when the Activity become vulnerable to being destroyed by the system, but it isnt called if the user willingly closes it. Thats good, because it is an intuitive and expected behaviour.
Because onSaveInstanceState() is not always called, if youre saving data you should do that when the application gets paused - in the onPause() function.
That way it will be possible to later restart the destroyed Activity (if the system decides to destroy it) with the saved previous state.
That is all for today.
Thanks for reading!
Read more »
In Android all Activity objects are saved in a stack. Whenever an Activity launches another Activity, the new one is moved to the stack and becomes the active Activity. The previous one also remains in the stack, but it is moved lower. Activity objects in a stack are never repositioned, they can only be added or removed.
When the user presses the Back button on their device, the current Activity is pushed out of the stack and is replaced with the previous one, which becomes visible again.
If there are multiple Activities of the same class in a stack, they are treated as separate instances.
A stack with Activities in it is called a task, which can be put in the foreground, when one of its Activities is currently active, or in the background, where its completely out of user focus.
If the user doesnt interact with a task for a long period of time, the system clears all of that tasks Activities, except for the main one. To save the state of an Activity before it is destroyed, which is done after the onDestroy() method is called, you can use the onSaveInstanceState() method. Android calls it before creating an Activity, before calling onPause().
The system sends a Bundle object this way, which can be used to store some data to later be able to recreate the same Activity state. When the Activity is once again called, the system kindly sends the Bundle with all the parameters youve written as a parameter of the onCreate() method, as well as the onRestoreInstanceState() method, which is called after onStart(), so that one of them (or both) could return the Activity to what it looked like before.
The onSaveInstanceState() and onRestoreInstanceState() methods are not a part of the lifecycle of an Activity. They wont always be called by the system. For example, the onSaveInstanceState() method is called when the Activity become vulnerable to being destroyed by the system, but it isnt called if the user willingly closes it. Thats good, because it is an intuitive and expected behaviour.
Because onSaveInstanceState() is not always called, if youre saving data you should do that when the application gets paused - in the onPause() function.
That way it will be possible to later restart the destroyed Activity (if the system decides to destroy it) with the saved previous state.
That is all for today.
Thanks for reading!
Android beginner tutorial Part 90 Path and ArcShape
In this tutorial we will learn about drawing primitive shapes in Android using Path and ArcShape classes.
The Path class is similar in usage to the way shapes are drawn using AS3. It has the moveTo() and lineTo() methods that youve probably worked with before if you ever tried drawing graphics using Actionscript3.
Using this class it is possible to draw unordinary primitive shapes, like, for example, a star.
First we set up the path for the lines to follow:
You can then apply the drawing to a ShapeDrawable object.

Next class is ArcShape. This one lets us draw arcs, basically. There are two values you need to pass to the ArcShape constructor - float startAngle and float sweepAngle.
Example:

Now weve covered all the primitive shape drawing classes.
Thanks for reading!
Read more »
The Path class is similar in usage to the way shapes are drawn using AS3. It has the moveTo() and lineTo() methods that youve probably worked with before if you ever tried drawing graphics using Actionscript3.
Using this class it is possible to draw unordinary primitive shapes, like, for example, a star.
First we set up the path for the lines to follow:
Path p = new Path();
p.moveTo(50, 0);
p.lineTo(25, 100);
p.lineTo(100, 50);
p.lineTo(0, 50);
p.lineTo(75, 100);
p.lineTo(50, 0);
You can then apply the drawing to a ShapeDrawable object.
ShapeDrawable shape = new ShapeDrawable(new PathShape(p, 100, 100));
shape.setIntrinsicHeight(100);
shape.setIntrinsicWidth(100);
shape.getPaint().setColor(Color.RED);
shape.getPaint().setStyle(Paint.Style.STROKE);
Next class is ArcShape. This one lets us draw arcs, basically. There are two values you need to pass to the ArcShape constructor - float startAngle and float sweepAngle.
Example:
ShapeDrawable shape = new ShapeDrawable(new ArcShape(0, 250));
shape.setIntrinsicHeight(100);
shape.setIntrinsicWidth(100);
shape.getPaint().setColor(Color.RED);
Now weve covered all the primitive shape drawing classes.
Thanks for reading!
Monday, January 26, 2015
IJOY Rebel Android Tablet Firmware software
i-Joy Rebel Android Tablet Firmware Rom
Specifications:
LCD | 7" Capacitive Touch Screen 5 Points |
Screen Resolution | 800x400 Pix |
Processor | 1.2 Ghz ARM CortEx A8 |
Chipset / Boxchip | Allwinner |
RAM | 512 MB DDR3 |
Built in Memory | 4 GB |
External Memory | Support Micro Card (MAX. 32GB) |
Wifi | 802.11 b/g/n supported |
Blue tooth | N/A |
3G | Support USB 3G Dongle, EVDO/WCDMA |
Camera | 0.3 MP Front |
HDMI | 1.4 |
Speaker | N/A |
Weight | 303g |
Android Version | 4.0.3 |
Flashing Tool | Download : LiveSuit Pack |
Flashing Tutorials | see Tutorial : how to flashing tablet with Livesuit |
You can also use Multi tools to wipe rom : Android Multi Tools
Note:
The following firmware / ROM file will be used when your Android tablet facing various problems . In case of
1. Forgotten Pattern Lock ,
2.Too many pattern attampt / Reset user lock
3.Tablet stuck on Gmail account
4. Tablet stuck on Android logo
5.Tablet hang on start up
you can use this Android Tablet firmware ROM to make your Android China tablet working again .
Flashing stock firmware should be last option.
Additional Downloads :
Technical Data
Technical Data
DOWNLOAD OFFICIAL FIRMWARE
Saturday, January 24, 2015
Android beginner tutorial Part 85 Embedding fonts using Assets
In this tutorial we will learn how to load and use a font from an asset.
Assets are somewhat similar to resources, yet different. While resources are embedded into the application and can be referred to using the R class, assets are raw files that are stored in the assets directory and require us to manually read them to use them in our applications.
Today well learn how to embed and use a raw .ttf font file as an asset in our application.
First of all you need to find the ttf file. You can download fonts online, I use fontsquirrel.com - all the fonts there are free and pretty good.
Once you have the .ttf file, put it in the assets directory of your project.
Then go to activity_main.xml of your application and add a TextView there:
Now go to MainActivity.java class and load the font using Typeface.createFromAsset() static method. Once the font is extracted, apply it to the text using setTypeface() method:
Heres the full code:
It is that easy!
You can use assets to store all sorts of files and read them byte by byte or using whats provided by the Android SDK, like the Typeface.createFromAsset() method just now.
Thats all for today.
Thanks for reading!
Read more »
Assets are somewhat similar to resources, yet different. While resources are embedded into the application and can be referred to using the R class, assets are raw files that are stored in the assets directory and require us to manually read them to use them in our applications.
Today well learn how to embed and use a raw .ttf font file as an asset in our application.
First of all you need to find the ttf file. You can download fonts online, I use fontsquirrel.com - all the fonts there are free and pretty good.
Once you have the .ttf file, put it in the assets directory of your project.
Then go to activity_main.xml of your application and add a TextView there:
<LinearLayout xmlns:android="http://schemas.android.com/apk/res/android"
    xmlns:tools="http://schemas.android.com/tools"
    android:layout_width="match_parent"
    android:layout_height="match_parent"
    android:orientation="vertical"
    tools:context=".MainActivity" >

    <TextView android:layout_width="match_parent"
        android:layout_height="wrap_content"
        android:id="@+id/myText"
        android:textSize="36sp"
        android:text="Hello world!"
        />

</LinearLayout>
Now go to MainActivity.java class and load the font using Typeface.createFromAsset() static method. Once the font is extracted, apply it to the text using setTypeface() method:
TextView mytext = (TextView)findViewById(R.id.myText);
Typeface face = Typeface.createFromAsset(getAssets(), "yukarimobil.ttf");
mytext.setTypeface(face);
Heres the full code:
package com.example.codeforfoodtest_two;

import android.app.Activity;
import android.graphics.Typeface;
import android.os.Bundle;
import android.widget.TextView;

public class MainActivity extends Activity{

@Override
protected void onCreate(Bundle savedInstanceState) {
super.onCreate(savedInstanceState);
setContentView(R.layout.activity_main);

TextView mytext = (TextView)findViewById(R.id.myText);
Typeface face = Typeface.createFromAsset(getAssets(), "yukarimobil.ttf");
mytext.setTypeface(face);
}
}
It is that easy!
You can use assets to store all sorts of files and read them byte by byte or using whats provided by the Android SDK, like the Typeface.createFromAsset() method just now.
Thats all for today.
Thanks for reading!
Thursday, January 22, 2015
Allwinner A13 IJOY DRACO 4 GB Android Tablet Firmware software
i-Joy DRACO
4 GB Android Tablet Firmware
Boxchip Allwinner A13
China Android Tablet Firmware Collection
Specifications:
LCD | 7" Capacitive Touch Screen 5 Points |
Screen Resolution | 800x400 |
Processor | 1.2 Ghz ARM Cortex A8 |
Chipset / Boxchip | Allwinner A13 |
RAM | 512 MB DDR3 |
Built in Memory | 4 GB |
External Memory | Support Micro Card (MAX. 32GB) |
Wifi | 802.11 b/g/n supported |
Blue tooth | N/A |
3G | Support USB 3G Dongle, EVDO/WCDMA |
Camera | 0.3 MP Front |
HDMI | 1.4 |
Speaker | N/A |
Weight | 330g |
Android Version | 4.2.2 |
Battery | 3.7V |
Technical Support .
The following firmware / ROM file will be used when your tablet facing various problems . In case of
1. Forgotten Pattern Lock ,
2.Too many pattern attempt / Reset user lock
3.Tablet stuck on Gmail account
4. Tablet stuck on Android logo
5.Tablet hang on start up
you can use this Tablet firmware ROM to make your Android China tablet working again .
Flashing stock firmware should be last option.
Additional Downloads :
Flashing Tool : Download : LiveSuit Pack
Flashing Tutorials: See Tutorial : how to flashing tablet with Livesuit
Flashing Tutorials: See Tutorial : how to flashing tablet with Livesuit
You can also use Multi tools to wipe ROM : Android Multi Tools
MANUAL SHEET
DOWNLOAD OFFICIAL FIRMWARE
Subscribe to:
Posts (Atom)